

The Loyalty platform's Batch Offer assignment feature simplifies the process of distributing Offers in bulk to loyalty members. This process eliminates the need for manual export and import processes; instead, the feature provides a streamlined bulk assignment workflow directly in the Offer.
From the Issue Offers tab, you must identify the Members that should receive the Offer. To identify the desired Members, you can either: select one or more Segments, or upload a file of Member identifiers. Both of these methods are described below.
Note: The Issue Offers tab is displayed only if the Batch Offer Assignment feature has been enabled in your account. Speak to your Zeta team for more information on enabling this feature.
For whichever method you utilize, the platform will automatically generate Offer Responses assigned to all the Members in the Segment(s) or import file. You can also assign certificate codes as part of this process. Please note that these Offer Responses will respect the effectivity period, Response period, Usage period, and Preferred Location Time Zone configured for this Offer.
Note: The Offer must have a status of Published in order to execute the Batch Offer assignment process.
The Batch Offer assignment feature is a batch process that runs in the background. After initiating the process, you can navigate away from this screen, and the process will continue until completed.
Batch Offer Assignment: File Upload
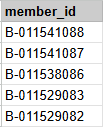
To assign Offers based on an import file, the file must be comma-separated, contain only the Member identifiers, and have a column header name of member_id. The valid options for Member identifiers are Member ID, email address, and Integration ID. For example:
Note: The header column name in the import file must be member_id regardless of the information stored in the column.
To assign Offers to all Members in a file:
-
Select Campaigns from the top navigation bar, then select Offers > Offers from the side navigation menu. The Offers screen is displayed.
-
Search for and select the desired Offer (see Search for an Offer for more information on the available search options). The Offer Details screen is displayed, with the Definition tab selected by default.
-
Select the Issue Offers tab.
-
Within the Select Audience Source section, select File Upload.
-
Click Choose File. Browse to and select the file of Member identifiers, then click Open.
-
Select the desired status for the new Offer Responses that will be created:
-
Pending: These Offers are immediately available for redemption without any action from the Member.
-
Clipped: Used in optional opt-in flows where Members must select or "clip," an Offer. Automatically clips the Offer, making it immediately available for redemption without any action from the Member.
-
-
Optionally, toggle Certificates on Responses to On to assign certificate codes to the Offer Responses (see
-
Click Issue Offer. A confirmation dialog box is displayed; click Confirm.
The file will appear within the History section with a status of Processing. When the file is finished processing, the status changes to Complete. For more information on the options available within the History section, please see
Batch Offer Assignment: Segment
The platform allows you to assign Offers based on a Member’s inclusion in one or more Segments.
The process of selecting the desired Segments varies depending on whether or not you assigned Segments to this Offer on the Eligibility tab (see
Offer with Segments Assigned
If you assigned one or more Segments to this Offer on the Eligibility tab, you can choose only from among those assigned Segments.
-
Select Campaigns from the top navigation bar, then select Offers > Offers from the side navigation menu. The Offers screen is displayed.
-
Search for and select the desired Offer (see Search for an Offer for more information on the available search options). The Offer Details screen is displayed, with the Definition tab selected by default.
-
Select the Issue Offers tab.
-
Within the Select Audience Source section, select Use Segments from Eligibility Tab. The platform displays a list of all the Segments that were chosen on the Eligibility tab.
-
Check one or more Segments. The platform will assign this Offer to all Members selected by at least one of the checked Segments.
-
Optionally, click Refresh Segments to refresh all of the checked Segments.
-
Select the desired status for the new Offer Responses that will be created:
-
Pending: These Offers are immediately available for redemption without any action from the Member.
-
Clipped: Used in optional opt-in flows where Members must select or "clip," an Offer. Automatically clips the Offer, making it immediately available for redemption without any action from the Member.
-
-
Optionally, toggle Certificates on Responses to On to assign certificate codes to the Offer Responses (see
-
Click Issue Offer. A confirmation dialog box is displayed; click Confirm.
Offer without Segments Assigned
If you did not assign Segments to this Offer on the Eligibility tab, you can choose from among all published Segments in your Loyalty account.
-
Select Campaigns from the top navigation bar, then select Offers > Offers from the side navigation menu. The Offers screen is displayed.
-
Search for and select the desired Offer (see Search for an Offer for more information on the available search options). The Offer Details screen is displayed, with the Definition tab selected by default.
-
Select the Issue Offers tab.
-
Within the Select Audience Source section, select Select Segment.
-
Using the Search field, search for the desired Segment by typing in all or part of a Segment’s name, tag, or Segment Category. Select the desired Segment from the search results.
-
Repeat the above step as necessary. The platform will assign this Offer to all Members selected by at least one of the included Segments. Optionally, to remove a Segment, click the Delete icon.
-
Optionally, click Refresh Segments to refresh all of the included Segments.
-
Select the desired status for the new Offer Responses that will be created:
-
Pending: These Offers are immediately available for redemption without any action from the Member.
-
Clipped: Used in optional opt-in flows where Members must select or "clip," an Offer. Automatically clips the Offer, making it immediately available for redemption without any action from the Member.
-
-
Optionally, toggle Certificates on Responses to On to assign certificate codes to the Offer Responses (see
-
Click Issue Offer. A confirmation dialog box is displayed; click Confirm.
The batch Offer assignment job will appear within the History section with a status of Processing. When the job is finished processing, the status changes to Complete. For more information on the options available within the History section, please see
